MacBook Notch To-Do List: How to Put Your Tasks in the Notch
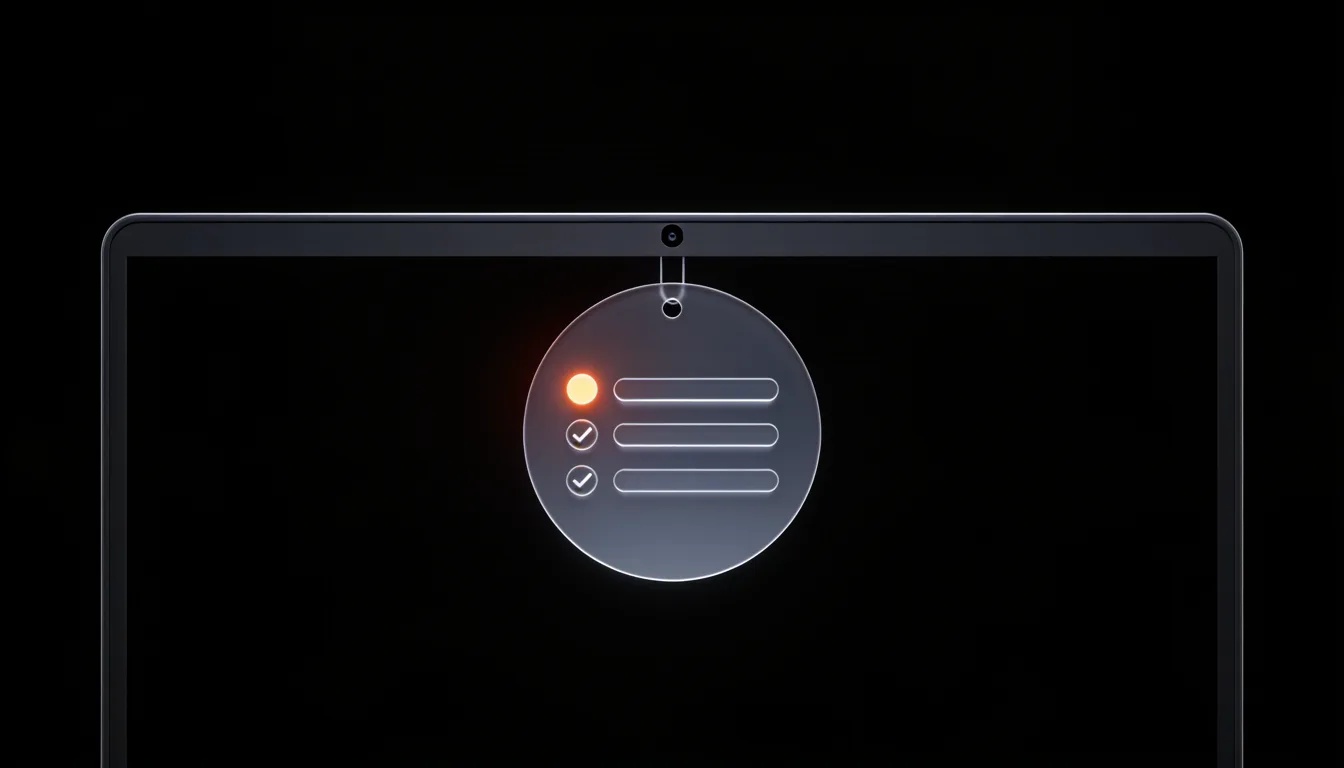
Yes, your MacBook's notch can hold your to-do list
The notch is the one part of your screen that is always visible and never covered by a window. That makes it the best place on a Mac for the thing you most often lose: the task you just thought of.
This guide shows how to set that up with Notchable, a Mac task manager that lives in the notch. By the end you will be able to add a task in about two seconds without leaving the app you are in, see what is due today at a glance, and keep a focus timer in view while you work. Every image below is a real screenshot of the app.
What you need: a Mac running macOS 14 (Sonoma) or later. A physical notch is not required; on Macs without one, Notchable sits at the top centre of the screen.
Step 1: Install it (two minutes)
- Download Notchable and drag it to Applications.
- Open it. There is no account to create. The free trial runs for 3 days with every feature.
- Move your pointer to the notch. It opens into a small panel with four columns: Tasks, Focus, Notes and Up Next.
That panel is the whole idea. It appears when you hover, and it goes away when you move on. Nothing takes over your screen.
Step 2: Add a task without leaving your app
Hover the notch and type what is on your mind, the way you would say it:
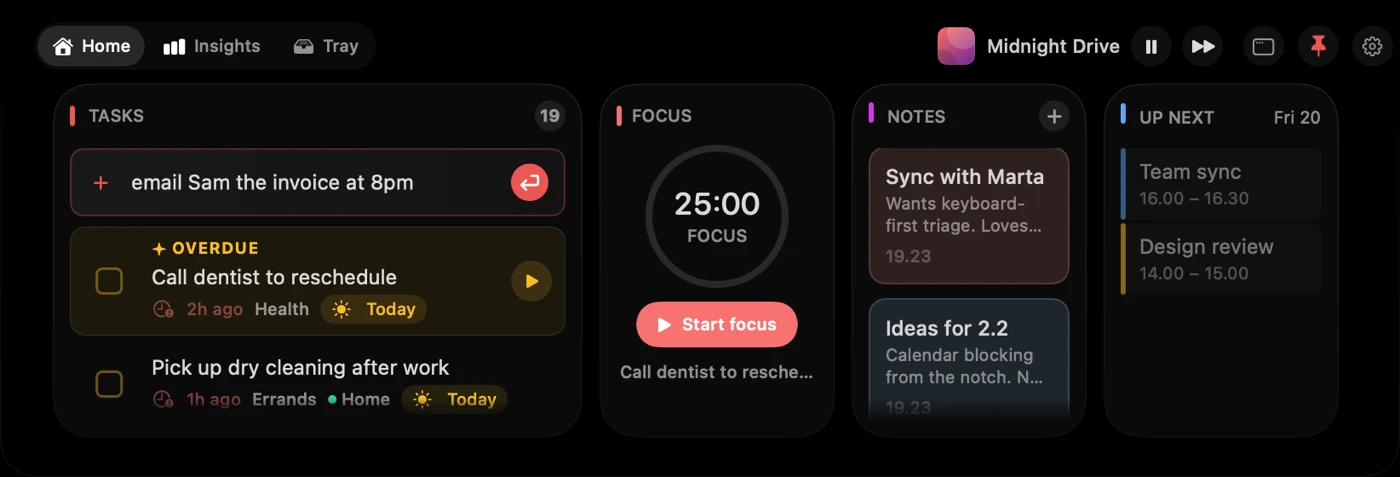
Press Return. A couple of seconds later the task is filed:
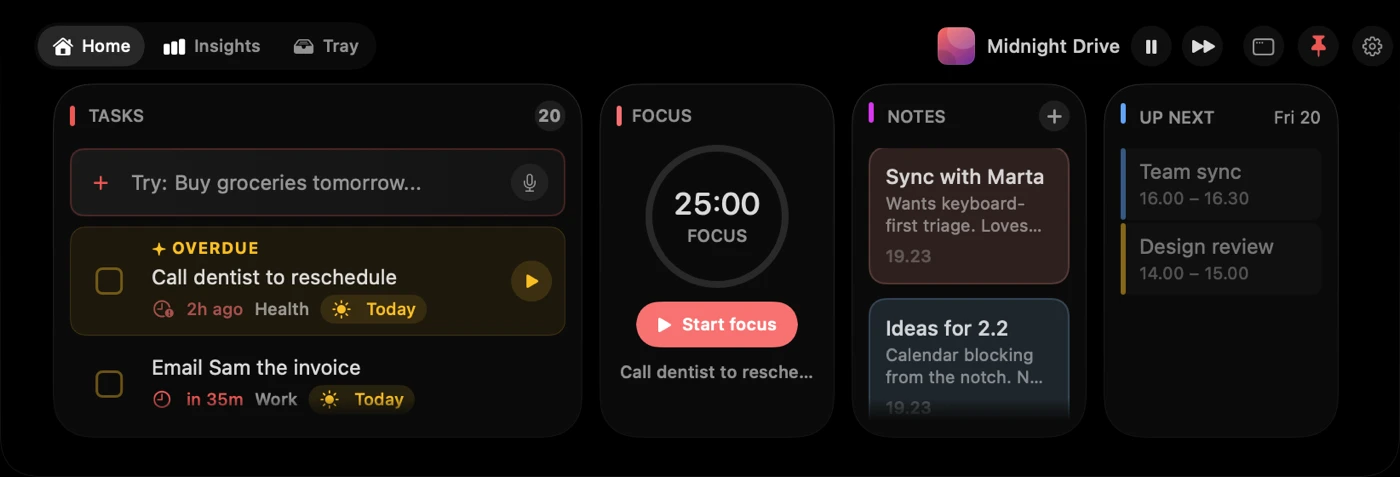
Notice what happened: "at 8pm" became 20:00, the task was tagged Work, and it landed in Today, with a tidy title. You did not open an app, choose a list or set a date. The window you were working in stayed in front the whole time.
Things you can type:
call the dentist tomorrow at 3pay rent at the end of the monthbuy milk and eggs, book flights, reply to Dana(one line, three tasks)- A sentence in another language. Dates and times are understood in many languages.
Prefer to talk? Click the microphone and say it. A spoken brain dump is split into separate tasks. Speech recognition runs on your Mac.
Step 3: See today at a glance
Whenever you hover the notch, the Tasks column shows what matters now: anything overdue at the top, then today's tasks with their times. Tick a box and the task is done.
For most of the day, that is all you need. You never open a "task app". You glance up, see the next thing, and get back to work.
Step 4: Keep a focus timer in view
Press Start focus in the notch to begin a session on your next task:
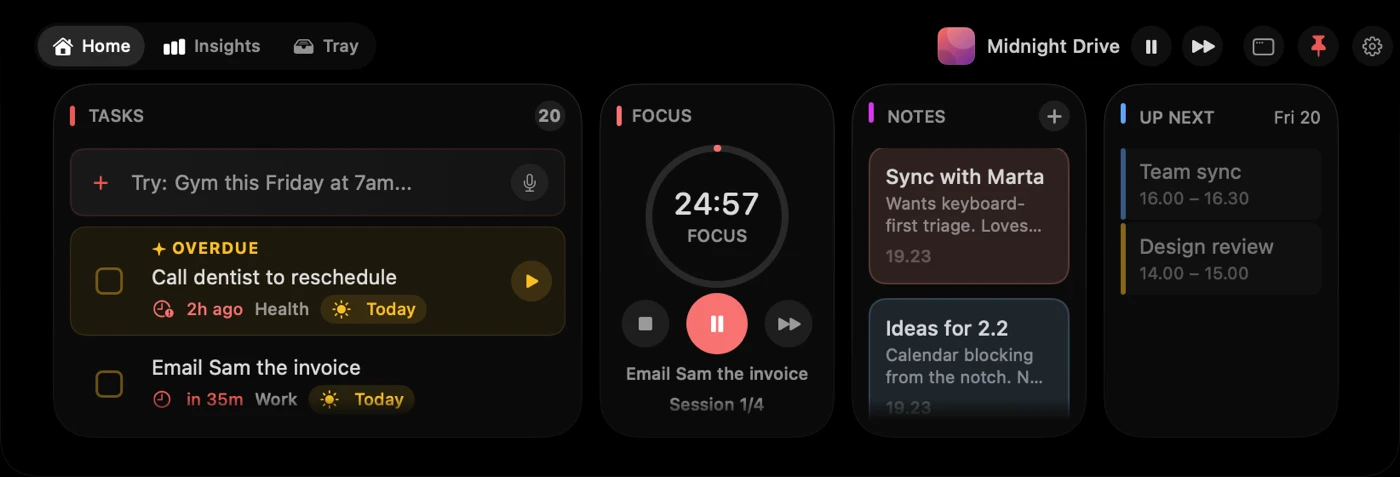
Now move your pointer away. The panel closes, but the timer stays: the notch widens slightly to show a progress ring and the countdown.

This is the part people with ADHD tell us matters most. A timer in a hidden window is a timer you forget. A timer in the notch is always there, and it never covers your work.
Step 5: Plan the day in the desktop app
The notch is for capturing and glancing. For planning, Notchable has a full desktop window (click the window button in the notch panel).
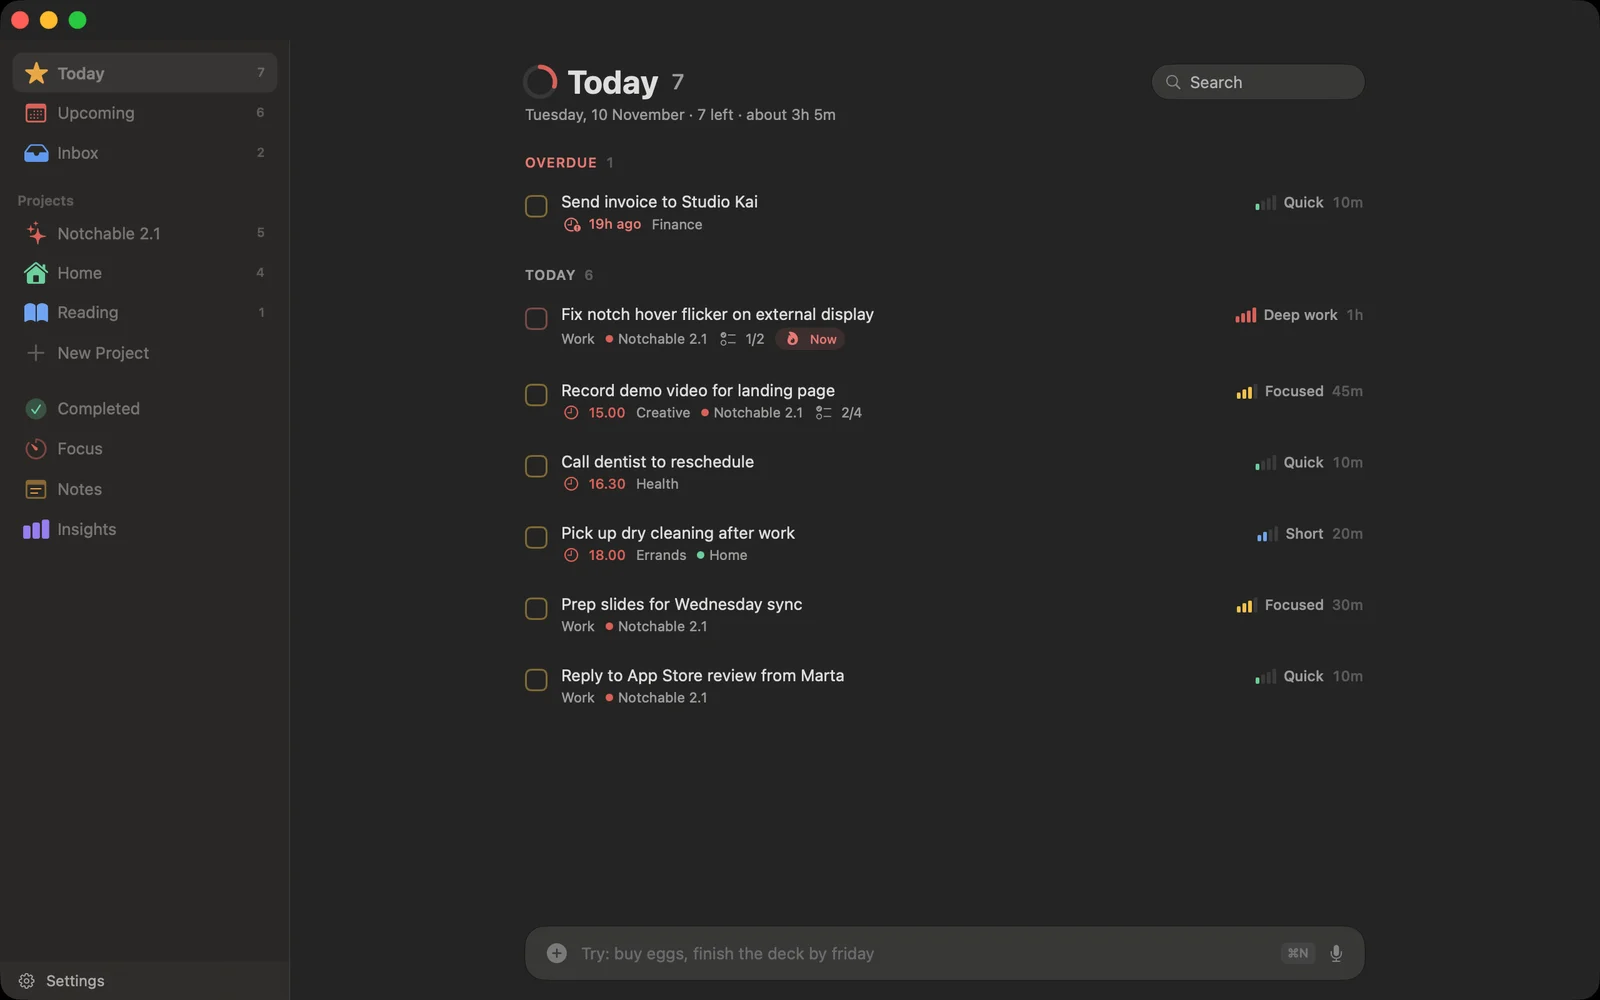
Three things here are worth knowing:
- Every task shows its size. Quick, Short, Focused or Deep work, with a time estimate. When you are stuck, pick by size instead of by importance.
- The header adds it up. "7 left · about 3h 5m" tells you whether the day fits before you start.
- Everything is one drag away. Drag a task onto Today, Upcoming, Inbox or a project to move it.
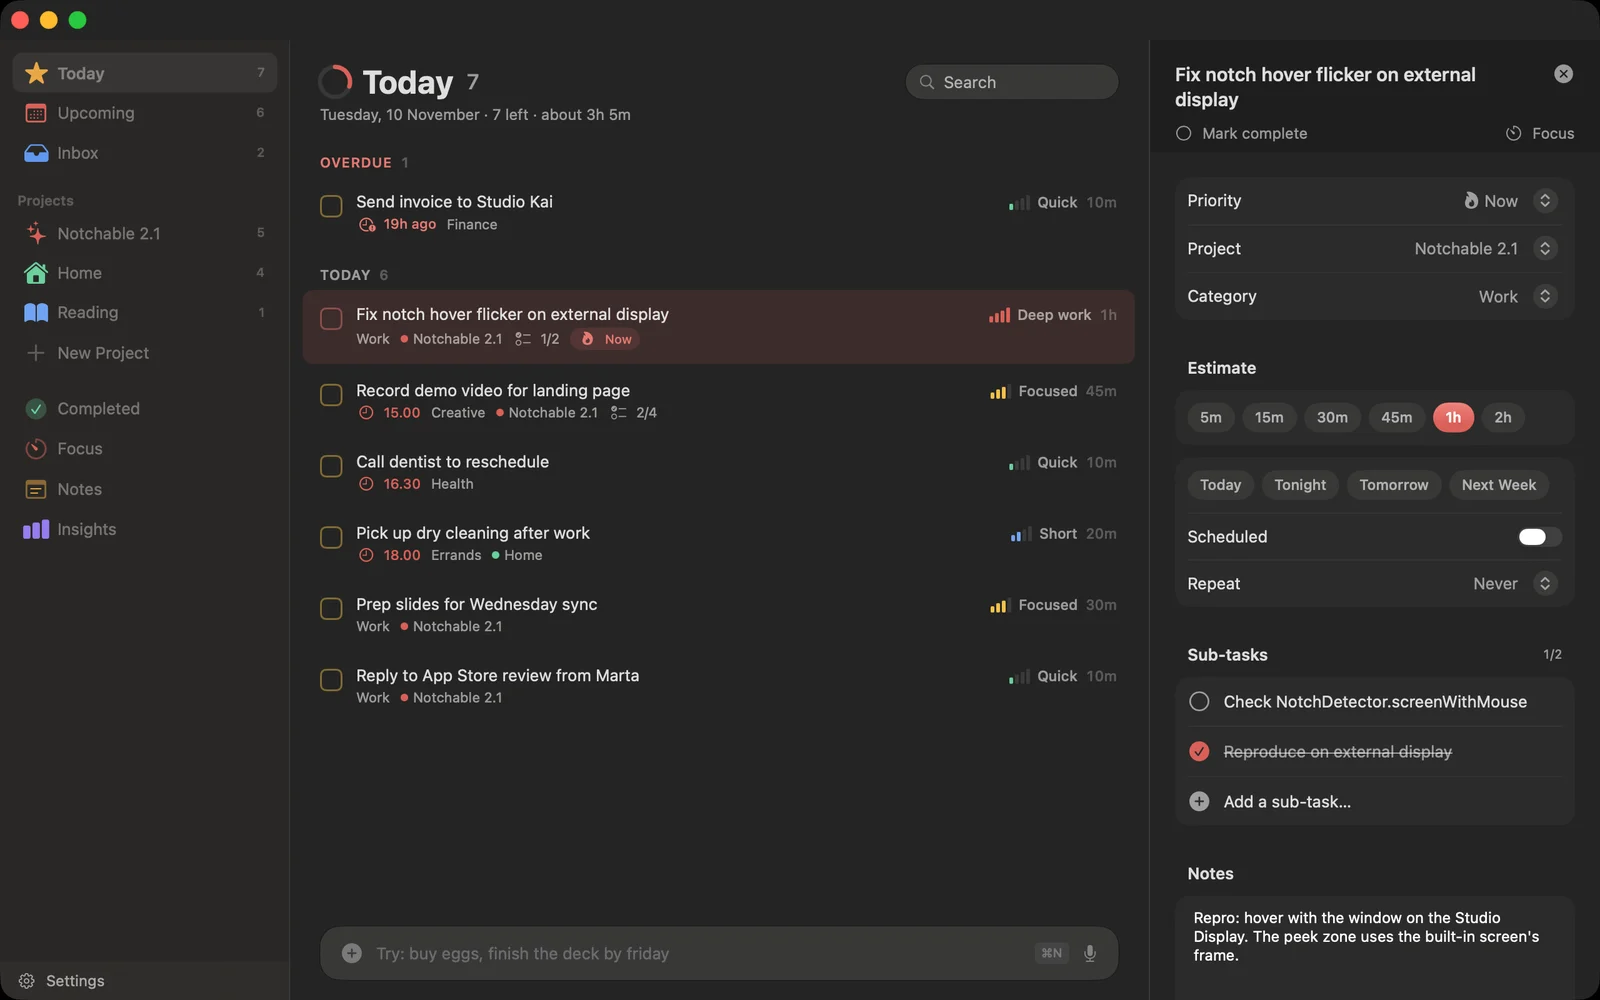
Click a task to open its details: priority, project, estimate, schedule, repeat, sub-tasks and notes.
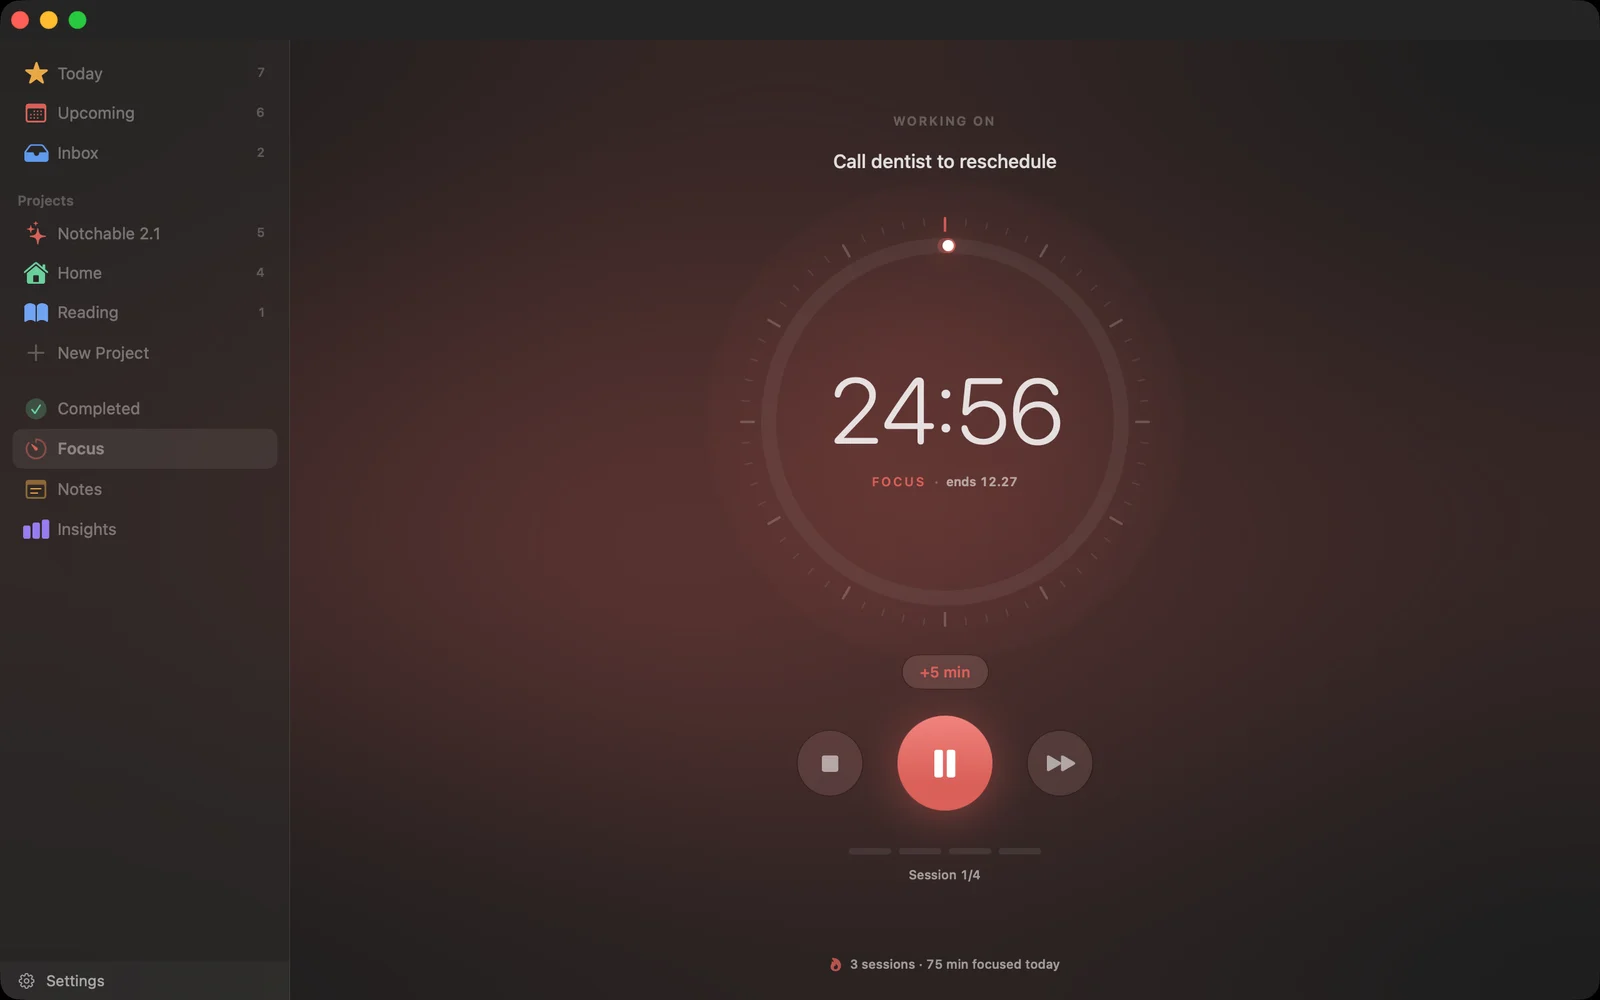
The desktop app also has a full Focus view, with a dial that shows when the session ends and a one-tap "+5 min" for when you are in flow:
Step 6: Finish the day, and see your week
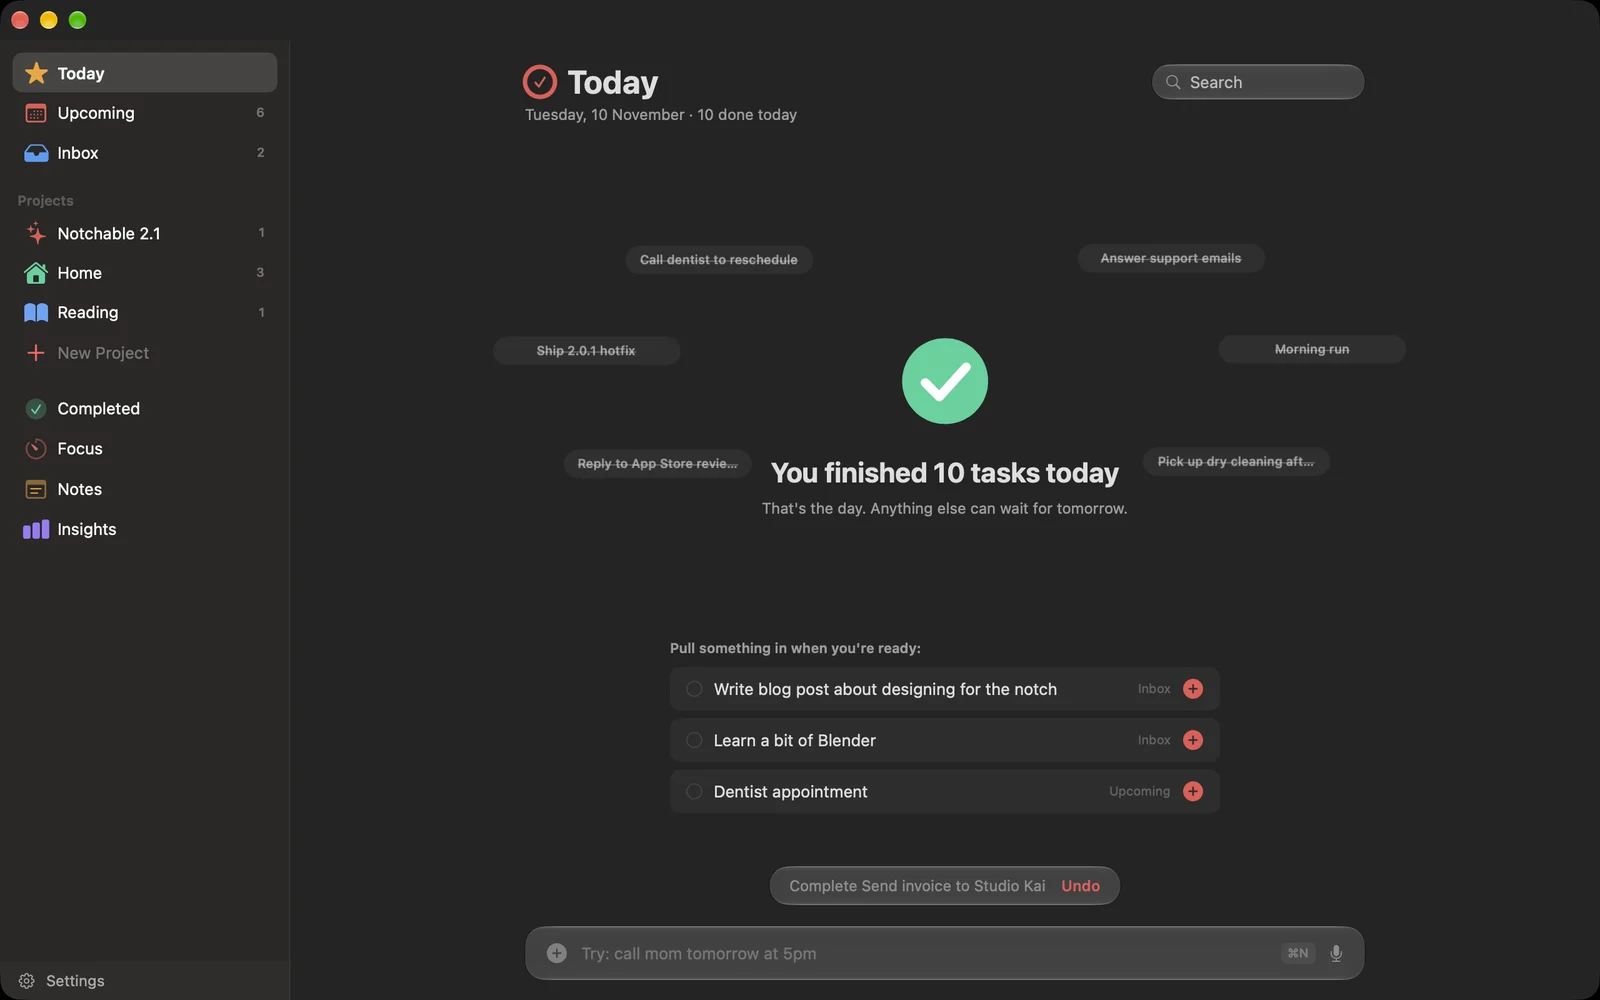
When you tick off the last task for today, you do not get an empty list. You get a moment:
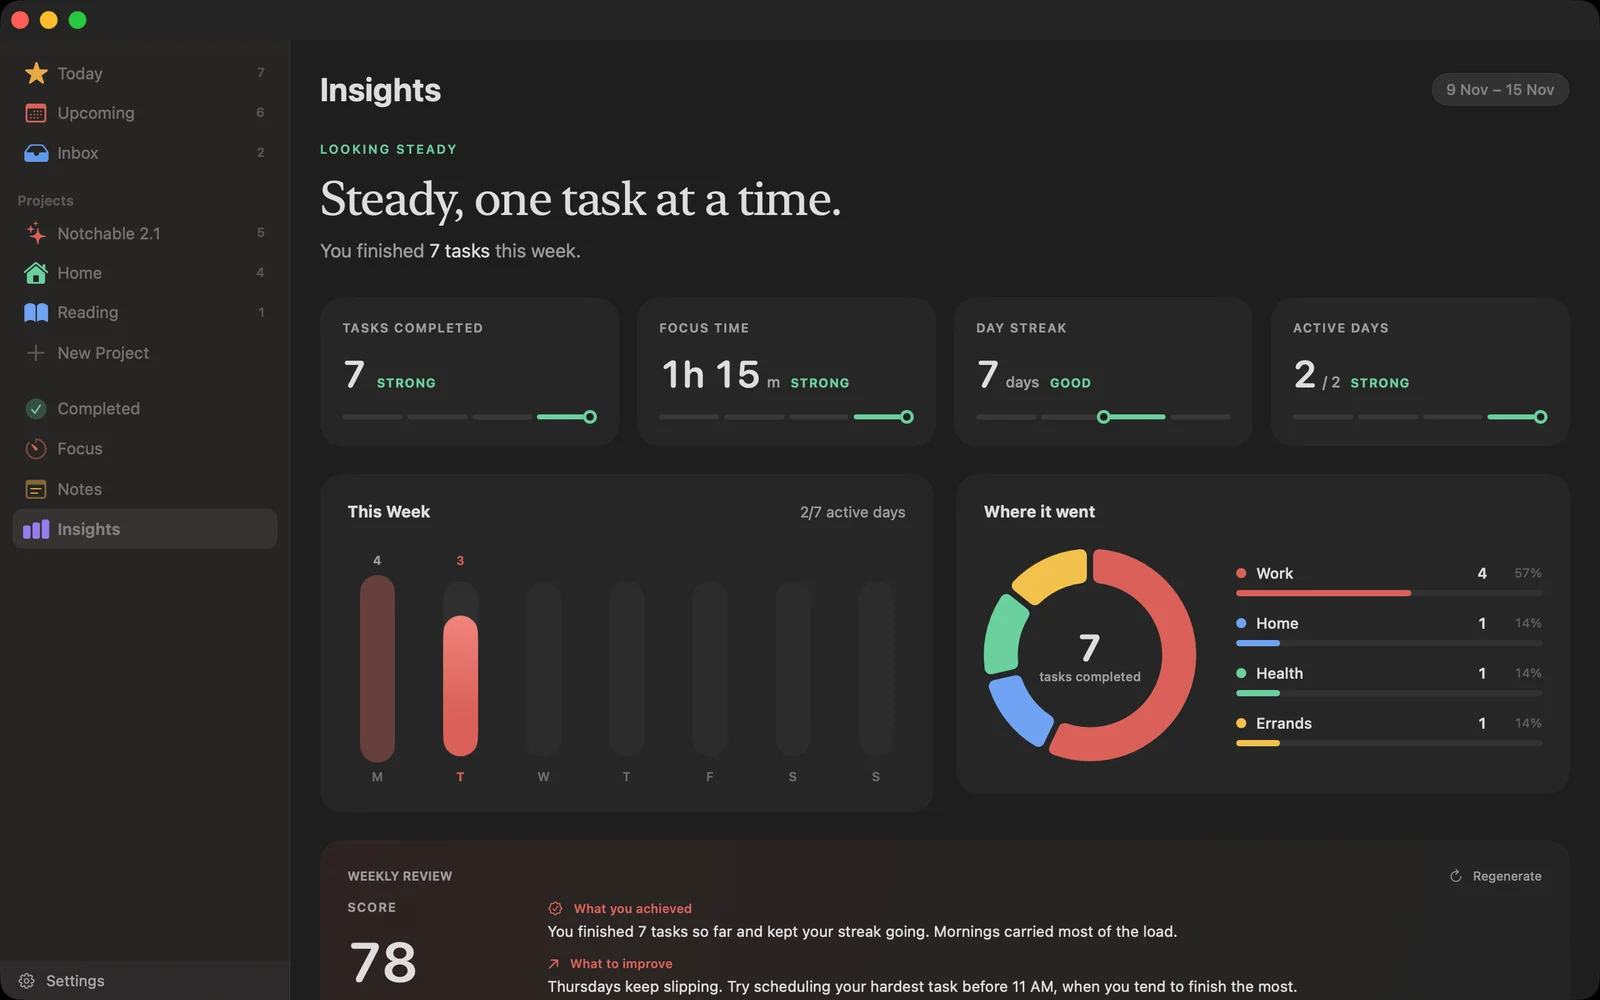
And once a week, the Insights page gives you a plain-language read on how it went, with the numbers behind it: what you finished, your focus time, your streak, and where your time went.
Step 7: Keep your iPhone in the loop
Turn on Reminders sync in Settings and Notchable creates a list called Notchable in Apple Reminders. From then on it syncs both ways: tasks you add on the Mac appear on your iPhone and Apple Watch with their due times, and reminders you add on the go (including with Siri) show up in the notch.
Common questions
Can you really put a to-do list in the MacBook notch? Yes. Notchable draws a panel that extends from the notch when you hover over it and tucks away when you leave. macOS does not offer this itself, so it takes an app.
Does it work on a Mac without a notch? Yes. On a Mac without a notch, the panel sits at the top centre of the screen.
Is it free? There is a free 3-day trial with every feature and no account. After that it is a one-time purchase: $9.99 for Lite (AI runs on your Mac) or $19.99 for Standard (cloud AI, the most accurate). There is no subscription.
Is it private? Your tasks are stored on your Mac. With Lite, the AI runs on your Mac and nothing you capture leaves it. With Standard, the text of a capture is sent to be sorted and is not stored. Speech recognition always runs on-device.
Will it get in the way? The panel only opens when you hover the notch (you can change this in Settings), and it closes by itself. During a focus session the closed notch shows only a small ring and the countdown.
Does it replace Apple Reminders? It does not have to. Many people keep Reminders for Siri and their iPhone, and use Notchable on the Mac for capture, planning and focus, with the two kept in sync.
Set it up now
It takes about two minutes, and the first task you capture from the notch usually explains the whole idea better than any guide.
Related reading:
Quick answers
- Can I put a to-do list in my MacBook notch?
- Yes. With Notchable, hovering the notch opens a small panel with your tasks, a focus timer, notes and your next calendar event. Typing a task there files it without leaving the app you are in.
- How do I add a task from the notch?
- Hover the notch, type what is on your mind the way you would say it (for example "email Sam the invoice at 8pm") and press Return. Notchable reads the time, picks a category and puts the task in Today.
- Do I need a Mac with a notch for this?
- No. Notchable runs on macOS 14 (Sonoma) or later. On Macs without a physical notch it sits at the top centre of the screen and works the same way.